Archive
Continuing Maintenance
I am often asked how does my vehicle line up for tour after tour of the roughest tracks in Australia, day after day, week after week, year after year. – the answer $$$$$$ and time spent on maintenance.
In the last few weeks I have been working non-stop on major and minor maintenance issues, some designed to ensure reliability, others designed to make my five months every year in the cabin more comfortable.
On the major maintenance side of things, I began with new CV shafts, a new new stub axle for the left wheel, new front wheel bearings and new freewheeling hubs.
Other items included the fuel sender unit. Last year at the end of the touring season, my main fuel gauge stopped reading, which stops the auxiliary tank transfer from being selected- not a good thing in remote areas. It is a pretty horrible job to drop the main tank (145L) so I’ve put it off until now. I obtained a new sender from Nissan for a reasonable price and I’ve held on to it waiting for an opportunity to do the job. My neighbour offered me the use of his 900kg gearbox jack which made matters much easier. Once I’d removed the tank, I removed the old sender and fitted the new one. See if you can spot the differences.

For some time I’ve also had, on occasions a horrible noise from the air conditioner belt which is usually alleviated in the bush by spraying the idler with lanolin spray. I noted that the idler was quite shiny and worn so elected to replace it in this round of maintenance. Interestingly it seemed to be rotating quite OK when I removed it, but the shiny marks on it indicated it wasn’t always doing so.
After many years in red dust country, the engine bay was looking quite dirty with red stains, so I elected to give the under bonnet area a good clean. I also removed the radiator and cleaned all of the grass seeds from it.
I had recently replaced the damaged headlights and corner lights with new units, so now took the opportunity to upgrade to High Intensity Discharge (HID) globes. I had a few issues with this installation including low beam being high beam and high beam being low beam, but managed to get that sorted, no thanks to the chinese instructions.
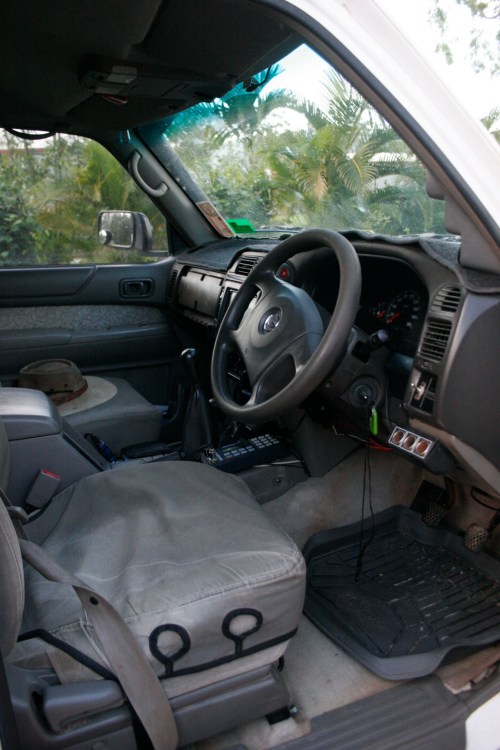
Once underway I elected to refurbish the cabin. since I spend almost half of my awake life in it. I first of all cleaned the entire cain, then removed everything – seats, carpet, console and dash. After seven years and nearly 300,000 of Australia’s worst kilometres it was time to spruce up the old girl. I found that Townsville Wholesale Paints can supply paint, suitable for vinyl and plastic trim, colour matched and delivered in aerosol cans. I took some trim in to match, and I must say I am very happy with the matching job.

The dash resprayed

The dash resprayed
Communications are an essential part of my job, and my vehicle reflects that. While many choose Sat Phones, here in north queensland, in the wet season, under heavy cloud cover, sat phones are useless. I’ve been using HF radio since I was 13 years old- some 37 years- and that is the medium I trust most. My vehicle is fitted with two HF radios, one VHF radio and three UHF radios, it is tracked 24 hours per day on HF radio, VHF radio and via satellite system known as SPOT. I have access to a range of HF frequencies including Royal Flying Doctor, VKS737, RadTel and Amateur Radio as well as Citizens Band 27 Mhz CB. I also have access to some Amateur VHF and UHF frequencies as well as Citizens Band UHF.
After many long seasons on rough roads, it was time to check all of the radio and antenna installations. First all of the antennas and feed lines were checked for faults, and all but one required some maintenance. The autotune HF antenna was not tuning below 4 MHz and also needed some attention. I tidied up the installation of the two HF radios and the APRS tracker, tidied up the wiring and installation of the UHF radios. I also relocated the Icom IC706 control head to the centre of the dash and relocated the Barrett 950 loudspeaker.

Barrett 950 and Icom IC706 on back of cabin

TinyTrack4 for Automated Position Reporting System (APRS)
The Continuing Saga of Freewheeling Hubs that have Gone to the Dogs 1
The original Nissan freewheeling hubs on my Patrol were replaced a few years ago when they became a bit worn (fairly common). I replaced them with AVM hubs on the basis that the OEM hubs were 4 times the price of the AVM units. My Patrol is a bit like Grandpa’s axe, you know the one that has been the best axe grandpa ever had, and he has had it 60 years. It has been a great axe – sure it has had three heads and five handles- but bloody hell it has been a great axe.
Anyway I digress- I’ve never been very happy with the AVM hubs, they seemed to suffer quite a bit of wear, particularly the left one, and those silly little torx screws seize and are therefore difficult to service on the Canning Stock Route or some other track where invariably they or the wheel bearings seem to require service. Getting the hub off when the screws sieze is difficult as the bolts require allen keys, and the caps, held on by those silly screws are in the way and this means the allen keys cannot be inserted squarely into the bolt head so must be round ended keys.

Difficult access when the torx screws won't come out
All of this is too complicated for a vehicle that has the toughest life and may require service in remote areas. My Patrol requires a great deal of maintenance to the wheel bearings, running as it does full time in rough, dusty and sometime very wet terrain. Running at full weight all the time on this terrain means that I find 15,000k is about as far as I can go without a repack of the wheel bearings- so those hubs had to go.
I found the OEM automatic hubs, such as are fitted to the wagon, for sale on ebay for a reasonable price, so I thought I’d give them a go. I’ve had them before on my wagons, and as long as I manually locked them in the real tough stuff they seemed to be OK. The beauty of them is they are very easy to remove.
After purchasing these hubs, I began the task of fitting them. I had planned to fit new wheel bearings and new CV shafts at the same time but elected to fit the hubs first and give them a try before I set to with the major work. I fitted them and found the left one a tight fit so investigated further. I removed both hubs and inspected the stub axle assemblies to see why one hub was not fitting well, thinking it would give me clues to the wear problem. It turns out that one stub axle is completely different to the other. It is a long story that I’ll save for another day, but a few years back, a hastily purchased and fitted stub axle delivered by my lovely wife to me on the side of a track in the middle of nowhere, may well have been for a GQ Patrol not a GU.
The GU hubs have four little notches in the end of the stub axle, the GQ has none. These notches align with four tabs on the automatic hubs, they cannot be fitted properly without them. Additionally I found that my axles should have, but never have had (since I’ve owned the car) circlips fitted to the CV shafts in the outboard position for manual hubs, and to the inboard position for automatic hubs, without these, the CV shaft can move outwards, wearing the hub.

GU Hub with four notches

GQ Hub with no notches
Olsen’s 4WD Tours and Training
www.djolsen.com
Canning Stock Route Adventure 2012
Some Minor Maintenance on the Patrol
The wet season has meant a late start to our touring season, and a tough year financially, but with only a few weeks to go before we start our touring season, I am catching up on some overdue maintenance. There are some major things to be done, but I can’t begin those until Justine’s car returns from the mechanic – it has had a clutch replacement.
So today I spent some time fixing things that wouldn’t require the Patrol to be un-driveable.
Both headlights were in need of replacement having been damaged by rocks, and also being in pretty poor shape overall with the adjustment seized. The corner lights were also quite crazed and coloured and the retainer fittings were no longer holding them in place- oh you have to love the corrugations on the Canning Stock Route!
I began by removing the grill and then the corner lights, and then the headlights. I purchased corner lights off ebay at $98 a pair, and headlights from Cheapa Auto Spares at $500 a pair. Nissan wanted over $1000 a pair for the headlights alone.
Fitting the headlights was a breeze but in doing so, I noticed the moulding panels under the headlights were in need of replacement. Nissan wanted over $390 for these little pieces of plastic. I found some on the net for $88 a pair and ordered them, so they’ll be a few days away.

Headlights come well packaged from Cheapa Auto Spares

Brand new headlight

Brand new corner light

Old headlight

Old corner light
For Sale- Kaymar Upright HF Antenna Bracket
Brand New. Never fitted. Cost $187. Sell $100 plus postage.

A $400 Roof Rack for My 4WD
The new Obieco box on the back of the Nissan has three Rhino rack uni-strut type assemblies running across front, middle and rear of the box. They are somewhat peaked in the middle. I needed to fit some kind of rack to allow tying down of swags etc but did not want to fork out over $1000 dollars. Whatever I came up with would have to be strong because I walk up there and carry large quantities of firewood at times.
While getting some other bits and pieces in Capral I noticed some aluminium walkway 6 metres long and 600 wide. It was very heavy duty mesh designed for elevated walkways. I figured at $400 a sheet, it would make a very strong and economical roof rack, so I purchased a sheet.
I cut two lengths to fit the racks front to back. At 600mm wide they would not fir all the way across the rack, so I left a small gap in the middle allowing the mesh to come out towards the edge of the box. I bolted it down with large washers and 10mm high-tensile bolts.
I am pretty happy with the result.


Fitting the New winch
Some of you may be surprised to learn that I did not have a winch fitted particularly doing what I do, however over my 30 years of off-road driving, I’ve hardly ever found a front mounted electric winch to be of significant enough use to warrant having one. Of course I have had them over the years on various vehicles, but not on this vehicle. I’ve always erred on the side of caution and almost never needed to winch. When I have to, I use a hand winch. Since it is usually my clients who get bogged, the portability of a hand winch is handy.
Finally however I decided that given the amount of winch training we do as a training organisation, I’d best fit a winch rather than use the clients’, or my other trainer’s vehicles. These days there are some great winches available at low prices, so after lots of research I decided to give the Tigers11 winch a try. I’d seen a few of them working out on the tracks and thought there were many attractive features, not the least of which was the price. I bought the 12000lb winch with plasma rope.
The winch was delivered to my house, and despite very minor damage to the switch cover it arrived intact. I watched the DVD which advises to buy the winch from someone who can offer warranty, and I must say I agree with that.
Fitting it to the Nissan (ARB) Commercial bar was not as easy as I had hoped. Eventually I relented and removed the bullbar which made the job very simple. Removing my bullbar is not simple, with 3 antennas and water connections running to it, as well as earth straps- it took some time.
I’ll post an update with pictures as soon as I complete the wiring.
Cabin Modifications
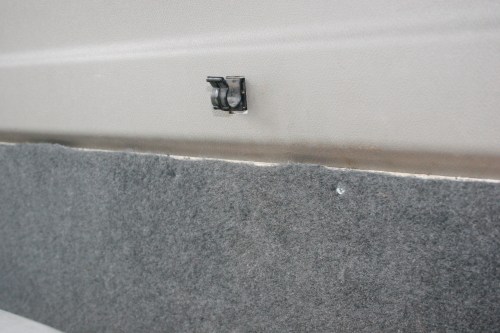
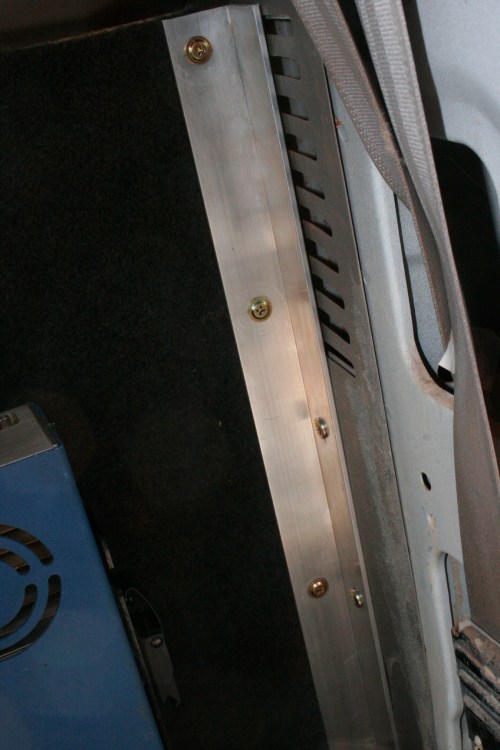
While doing the heater reinstall, I made a few changes. The rear wall of the cabin allows quite a bit of noise into the cab, and could use some better soundproofing. Additionally I needed more suitable means to mount radios etc. A 9mm sheet of ply cut to fit and covered with carpet suited both purposes. Rather than go to the trouble of fitting nutserts, I chose to use a bit of aluminium angle to attach the ply to the inner panels near the seatbelt mounts and side vents.
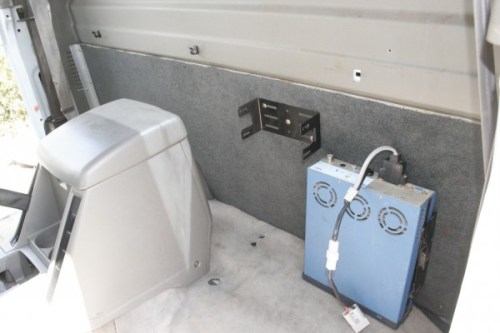
The ply sheet allowed me to fit the Barrett 950 HF and the Icom 706 MKIIG bracket. The 706 is currently in the house. The centre of the ply is screwed to the christmas tree plugs used to hold the plastic trim. The plastic trim has not been removed.
It is all back together now.